How can I effectively hang and clean Mylar?
| Added by:
snoofer Viewed: 894
times |
Rated by 8 users:
9.50/10 |
Contributed by: Perseus
Tools and materials needed: Self
Adhesive Velcro Strips, and sharp scissors / Exacto
knife Applying Velcro and mounting the
Mylar 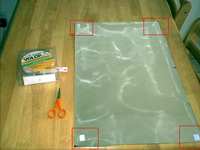 1. Cut the sheet of Mylar to the desired
shape and size 1. Cut the sheet of Mylar to the desired
shape and size
Note: Keep your Mylar clean as
possible! It picks up dust easily.
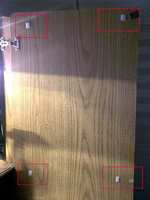
2. Take a
inch square (1.25 cm x 1.25 cm) of Velcro and remove the
protective paper from both sides
3. Apply one Velcro
square to each corner of your Mylar sheet using the
self-adhesive backing.
Note: you could pre-apply
squares to each side of your Velcro sheet so you can
easily flip the sheet over.
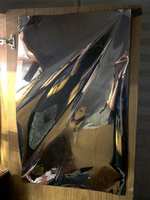 4. Once
the Velcro has been applied to each corner of your Mylar
sheet, grasp the Mylar sheet with both hands and apply
to the wall. 4. Once
the Velcro has been applied to each corner of your Mylar
sheet, grasp the Mylar sheet with both hands and apply
to the wall.
Dont worry about getting it
straight in this step...
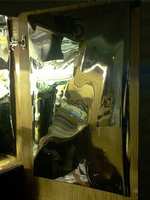 5. Once
the Mylar sheet has been applied, you can begin to
straighten the sheet by pulling each corner tight, one
at a time, and by reattaching the Velcro square. 5. Once
the Mylar sheet has been applied, you can begin to
straighten the sheet by pulling each corner tight, one
at a time, and by reattaching the Velcro square.
 6. Cleanup
is a snap; simply pull, and then throw away the Mylar.
Velcro remains for your re-app pleasure. 6. Cleanup
is a snap; simply pull, and then throw away the Mylar.
Velcro remains for your re-app pleasure.
This is
a very effective, and economic system for hanging your
expensive Mylar. Using this method you can hang your
Mylar without risk of damage from tacks or staples. The
risk of ripping the Mylar is greatly reduced.
Using Velcro to hang your Mylar will also allow
you to clean your Mylar with less risk of damage. Velcro
also allows you to re-adjust your Mylar as often as
necessary with ease.
Note: Mylar should be as
ripple-free as possible to avoid poor light reflection
and hot sopts.
Recycling and Reusing
Mylar
In the past I have thrown away Mylar after
it becomes too scratched and water stained, etc. Velcro
makes it easy to re-use your Mylar.
Simply apply
additional Velcro squares to each attachment location,
directly on top of the original attachment locations.
This is easy to do by sight and feel.
Additional Tips:
Purchase a roll of Velcro to save $$
Washing your hands prior to working with Mylar will
eliminate much of the natural oils, which are present on
your skin, and can smudge your shiny new Mylar. Using
gloves will eliminate this problem.
Use a tape measure to measure, and mark your Mylar
sheets prior to cutting - you will cut much straighter
sheets.
How to clean dirty Mylar
Over
time, your Mylar will become spotted and stained,
especially if you do a lot of foiliar feeding!
 Tools
and materials: Tools
and materials:
Glass cleaner
Wet dish
sponge
Clean paper towels
Soapy water in spray
bottle (Add a few drops of dish detergent to distilled
or R/O water for best results.)
1. Thoroughly
spray down the surface area of the dirty Mylar using the
soapy water.
2. Clean the Mylar in a downward
motion with the wet sponge, in a downward stroking
pattern. (This will push what dirt the sponge doesn?t
pick up to the bottom of your sheet for easy removal.)
3. Now that the dirt has been removed, liberally
spray the surface of the Mylar with standard glass
cleaner.
4. Using the same downward pattern wipe
the Mylar clean with the paper towels.
[Editor's note: you can also use Tuck
tape on the corners, but they often tear away. Or, you
can staple over squares of Duck tape to minimize wall
damage and ripping).] |
| Last modified: 14:50 - Mar 12,
2003 |
| |


