
How do I rig an Electric Float Reservoir
Controller?
Contributed by:
General Hygrow
OVERVIEW:
An electric
float switch is an alternative to float valves and
controller buckets (for which there already exists a
GROWFAQ entry for External
Reservoir and Control Bucket). They do not rely on
gravity to supply water, so the reservoir can be placed
anywhere that is convenient (at any height). Float
switches are easy to install and involve no plumbing or
extra buckets. They do, however, require some extra
hardware:
1. a relay [$6]
2. a (cheap)
submersible pump [you select]
3. an external
reservoir of water/nutrient (plastic garbage can)
4.
a hose to deliver the nutes to your hydro system.
5.
DC power supply (like from an old discman or something)
A float switch mounts inside of your
hydroponic system. It gets connected to a relay which,
in turn, controls the flow of AC current to an external
pump. This pump sits inside an external reservoir which
can be located anywhere that's convenient.
Let's
begin. Here's a float switch a purchased for $6 +
shipping from online auction. Search Ebay and you will
find some too.
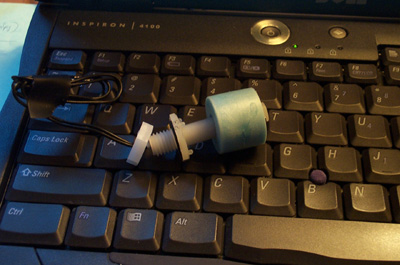
Notice the top unscrews to allow the
switch to be mounted as I have shown in the second
picture. You will need to find something you can attach
the switch to which will put the float at roughly the
height of the nutrient in your system. (I used a yogurt
cup and this was perfect for my 4" Shallow water
system.)
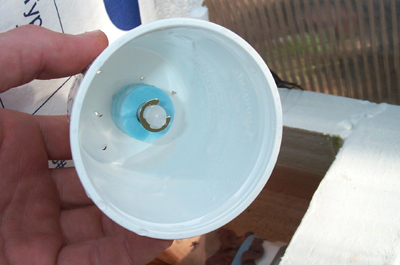
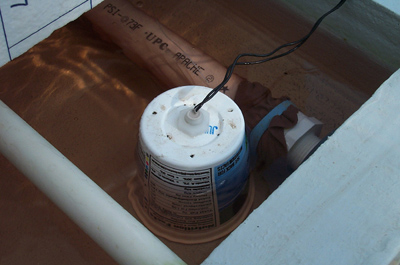
The switch, mounted on a holder of
some sort is then placed into the hydro system. [photo
#3] We'll worry about fine tuning the float height
later. First we'll get things working.
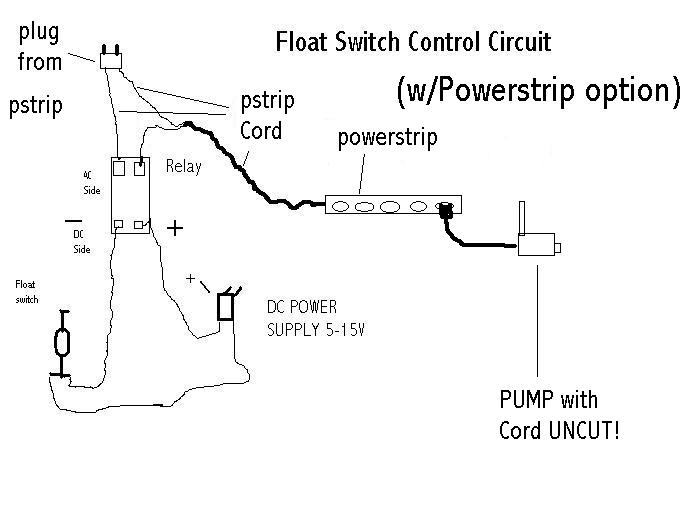
Next we need to understand how the circuit works.
The drawing shows how the relay, float switch, and
power supply get wired together.
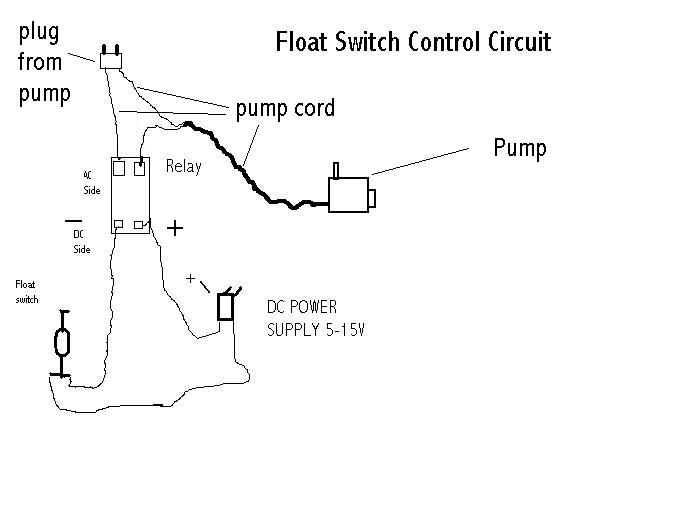
One
of the power supply's wires directly feeds the float
switch. Another wire runs between the float switch and
the relay(DC side). The last wire connects the relay(DC
side) to the other power supply wire. The AC side of the
relay connects to the two wires coming from your pump.
alternately, you can attach the two wires (power and
ground) from a power strip to the relay. This will allow
you to plug your pump into the powerstrip sockets,
instead of having to strip the wires off your pump.
Here's what the whole setup looks like.
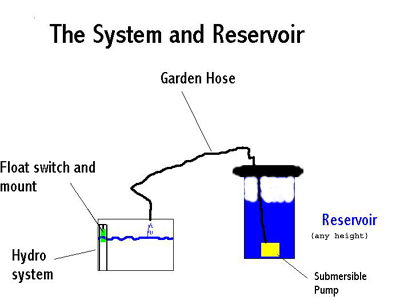
Note that the reservoir can be
placed anywhere, but to avoid the problem of
water continuing to siphon out of the reservoir and into
your system after the pump shuts off, make sure the
water is being pushed up to your system. That is,
make sure the outlet of the hose is above the height of
water in the reservoir. [Experiment with this and
please get it right, so you won't blame me for flooding
your house/apartment!] A simple way to accomplish
this is to allow the incoming water/nutrient to pour
into a standpipe of some sort (open on top to the
atmosphere) which channels the water into your system.
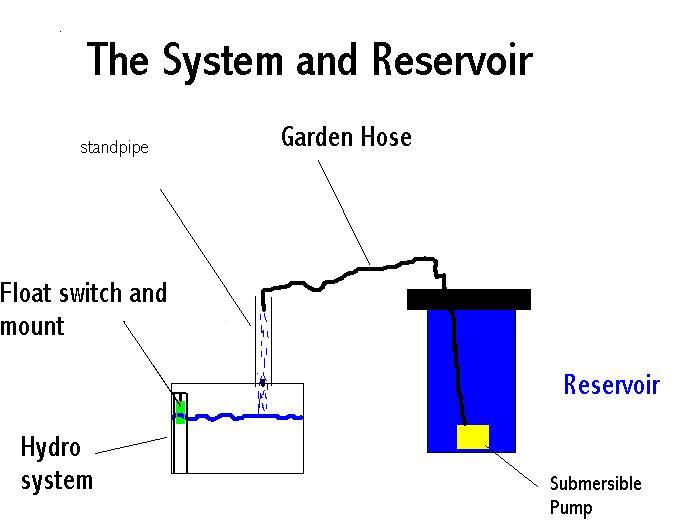
This topping method works fabulously
well for me. It allows the reservoir to be far away from
my hydro system, on a cool floor in fact, requiring no
space in the growroom. The res. can be placed at any
height that's convenient, unlike with gravity fed, float
valve topping method.
I find that float
switches are easier to setup and less prone to failure
than float valves. On the downside, you will need a pump
and some other parts to set up your float switch
controller. However these parts are fairly cheap and can
be found at surplus stores like http://www.allelectronics.com/ . Total
cost excluding pump and power strip: $15-20.
|